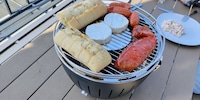

Flame in a jar: Gardenflare’s fire tube put to the test
The Gardenflare fire tube is designed to bring atmosphere to your patio or garden. But how does the device fare in practice when heating, operating and cleaning?
Our garden already has a fire area: a fire bowl with a cooking grate. This didn’t stop me from saying yes to a new product in our range a colleague from the purchasing department showed me. Namely, a fire tube from Gardenflare.
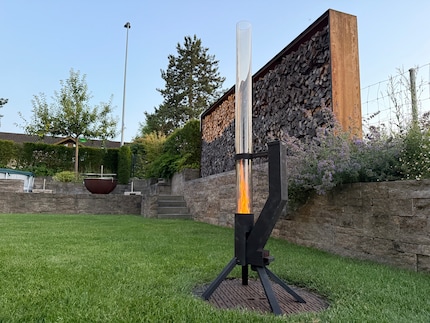
At first glance, the design with its stand and barrel reminds me a little of the mortars used by Russian soldiers in the war against Ukraine. Fortunately, the fire tube clearly serves peaceful purposes. According to the manufacturer’s website, it’s designed to «elegantly combine aesthetics and fire» and thereby «immerse the terrace and garden in an atmospheric ambiance».
Well, ambiance is a very subjective matter. That’s why my test is more about the set-up, operation and cleaning of the item. The photos might help you make up your own mind about how well it creates ambiance.
Setting up
The individual parts arrived well protected in a long cardboard box. The kit consists of nine parts and a load of screws with matching hexagon socket, all wrapped in individual plastic bags.
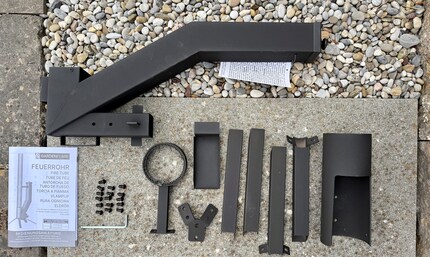
Then there’s the glass tube, of course. The most sensitive part of the delivery is wrapped in a sturdy cylindrical box with plastic lids, which are glued in place. I leave the tube in its secure casing for the time being and devote myself to assembling the stainless steel parts.
The Hamburg-based manufacturer, which produces in China, provided me with a model that has a black powder coating. Unlike the silver model, its surface isn’t smooth, but rough. The corrosion-resistant stainless steel is fairly sturdy. I measured just under two millimetres of wall thickness at the feet and even 2.5 millimetres of sheet metal at the combustion chamber.
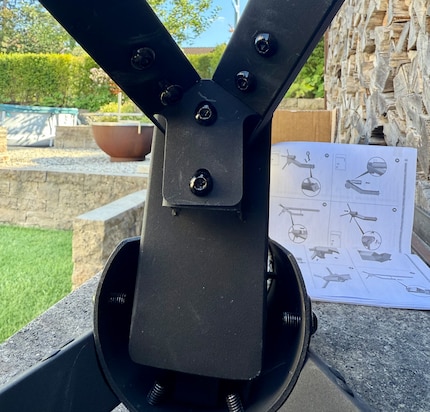
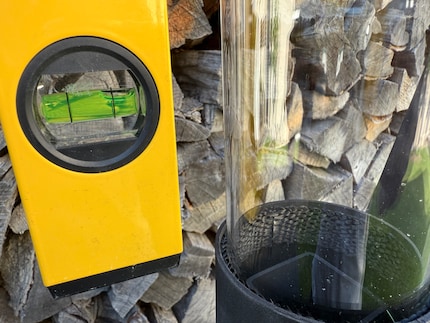
The instructions are easy to understand, but if you prefer moving images, you can also watch the video tutorial. What’s handy is that there’s only one type of screw. After just under 15 minutes, the frame is set up. However, I’m not happy that the glass tube isn’t perfectly vertical. So I unscrew the tube holder and the feet and put it all back together. My inner perfectionist just can’t handle it. I managed to slightly adjust the feet by applying some pressure. But I still can’t get the tube straight. Oh well.
Lighting up
Wonky or not, I want to see what the flame looks like in the glass tube. First, I insert the small drawer for the ashes. Next, I pour wood pellets into the pellet chute. According to the manufacturer, it can hold up to one kilo. In my case, it’s already full after about half that amount. Maybe they’re just packed too loosely.
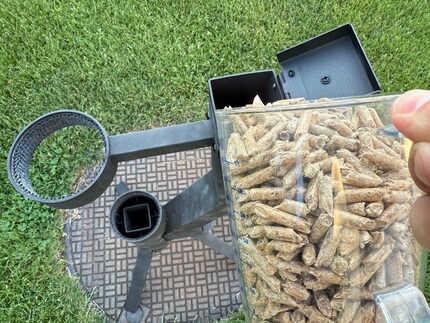
Gravity pushes the first load of pellets down towards the combustion chamber. There, you set light to them using a firelighter made of wood wool, for example. This works perfectly and requires no further action. The combustion chamber gets plenty of air from below.
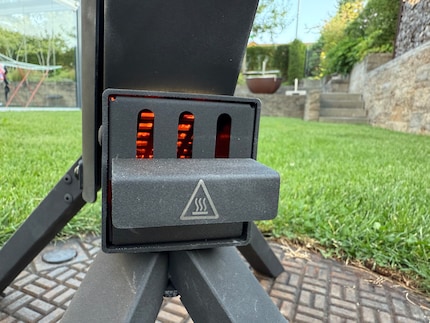
After just under fifteen minutes, the flames are licking halfway up the glass cylinder. Another ten minutes later, they’ve grown to the maximum height of one metre. I open the lid of the pellet chute to check what’s going on there. A lot has already slipped down. I shovel in a few more, so I can take photos in different phases of twilight.
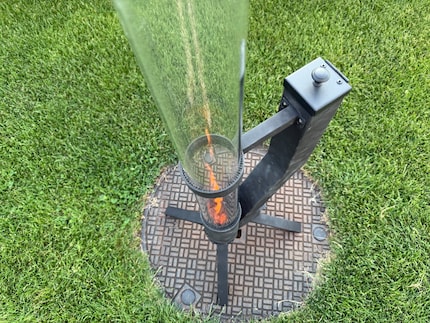
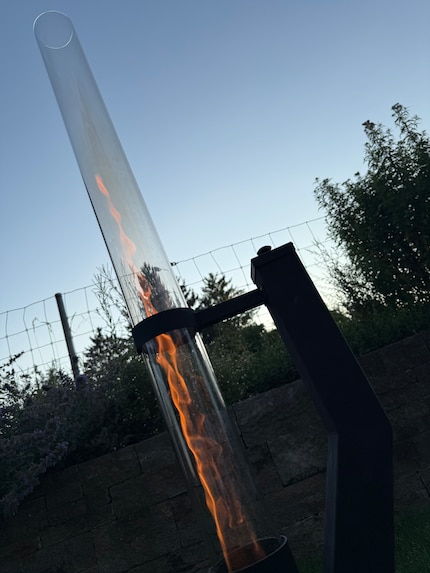
While the steel of the chute generates almost no heat, it’s really hot in and around the combustion chamber. My infrared thermometer reads over 400 degrees. So mind your fingers.
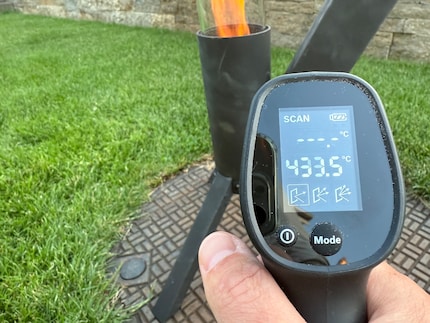
This is another reason why it’s important to think carefully about where you want to place the fire tube before you light it. According to the instructions, there should be no flammable objects within a three-metre radius. That means you need quite a generous space to set it up. You shouldn’t use it on a balcony if there’s another balcony or awning above you. After all, the heat from the flame is directed upwards onto a very small area.
Speaking of small spaces: the Gardenflare fire tube doesn’t need much floor space. 40 by 40 centimetres is enough.
You can also sit close to the tube, as the small combustion chamber gives off heat, but not as much as an open campfire or a fire bowl. And if you listen carefully, you can even hear a faint crackling sound.
Cleaning up
After enjoying the first round of fire, the glass tube is already noticeably dirty. The manual recommends cleaning after each use to prevent soot and dust to get caked in.
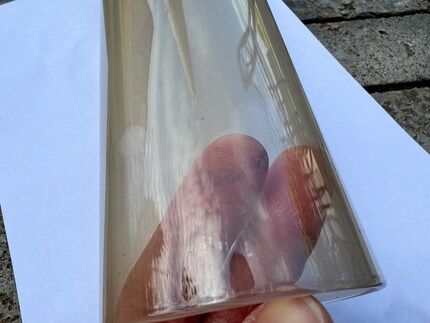
Water and standard washing-up liquid should be enough to tackle the dirt in the tube. Although that’s surely true, this only works for as far as my hands can reach. However, the tube is one metre long and also quite narrow with an inner diameter of just 70 millimetres. That means, I can only actually reach in a few centimetres. My daughter’s smaller hands and thinner arms would certainly be able to clean more. But I don’t want to avoid getting into any grey areas of labour laws. While regular bottle brushes aren’t wide enough, toilet brushes would do the trick, especially ones with a long handle. Tell you what would be even better, if Gardenflare included the right kind of brush.

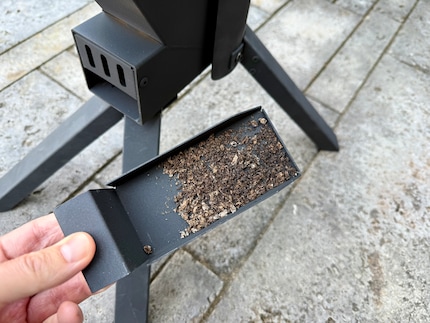
Fortunately, emptying the ash drawer is a lot less hassle. After letting it cool down for a few hours, you can just pull it out and empty it. I’m surprised at how little is left after an hour and a half.
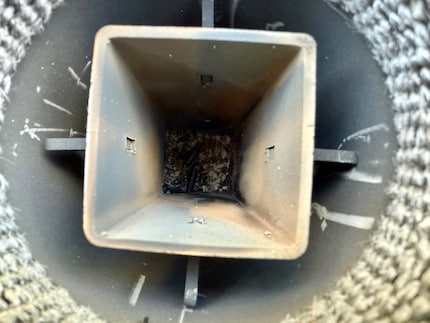
Looking down the combustion chamber from above, I can still spot a few crumbs, which I also empty. Overall, however, the pellets burn almost without residue.
Maintenance
The fire tube is operated with pellets and pellets only. So don’t even think about chucking charcoal or briquettes down the chute. The manufacturer recommends using pellets with a six-millimetre diameter and a length of 12 to 30 millimetres. The shorter they are, the denser you can pack them into the chute and the longer the flame will burn. By the way, six millimetres is the standard diameter of pellets. So if you can’t find any information on diameter in our store, for example, you’re safe to assume that it’s the recommended six millimetres.
You can keep a fire going for up to 75 minutes by scooping one kilo of pellets into the chute. According to the manufacturer, 600 grammes will keep on burning for 45 minutes. That roughly corresponds to my test results. Refilling is also an option, but you shouldn’t use the tube for longer than two and a half hours, according to the safety instructions.
Unless you’re using gourmet pellets for a smoker grill, you can get pellets at a price of 2.50 francs per kilo in our store. Possibly even cheaper at a DIY store. This means you’re looking at fuel costs of around two francs per hour of operation. Plus the time you need to clean the pipe the following day.
I like the fact that the manufacturer offers spare parts. So if your glass tube should break, for example, you can get a new one for 35 euros. That’s very fair, I find. (Unfortunately, the spare part isn’t currently available directly from us, but only from the manufacturer.)
What about the climate?
Burning wood pellets releases around 1.8 to 2.0 kg of CO₂ per kilo. For comparison: that’s about as much as a 10-kilometre drive by car or as much as 1,000 Google search queries.
Some people, especially representatives of the timber industry, even go so far as to describe pellets as sustainable. Why? Because they only release CO₂ that’s already been taken out of the atmosphere and stored by trees. So if new trees are planted to make pellets, the CO₂ will be out of the atmosphere and in the wood of the trees in a few decades.
Because of its long lifespan, the fact that a few kilos of steel were used to manufacture the fire tube hardly matters in terms of CO₂. So in total, you’re looking at around six kilos.
In a nutshell
What rockets are to Bezos and Musk...
Pro
- Excellent assembly tutorial video
- High-quality finish
- Inexpensive operation
- Good use of the fuel
- Spare parts can be reordered
Contra
- Laborious cleaning of the glass tube
- Tube isn’t at an exact 90-degree angle
Journalist since 1997. Stopovers in Franconia (or the Franken region), Lake Constance, Obwalden, Nidwalden and Zurich. Father since 2014. Expert in editorial organisation and motivation. Focus on sustainability, home office tools, beautiful things for the home, creative toys and sports equipment.


