
Background information
Homebrew for macOS: How to turn the terminal into a colourful zoo
by Florian Bodoky
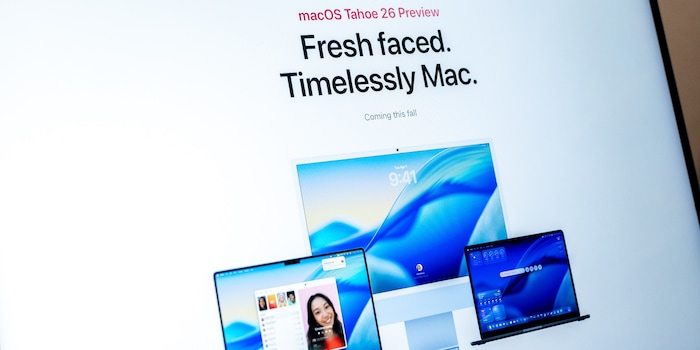
The new Spotlight search is annoying. With a custom-built folder navigator, you can move through folders and files much faster. Here’s how to set it up.
If you work with lots of folders and paths on a regular basis, you’ll know that Finder is an absolute maze. Every time, you have to start clicking from scratch again. To be fair, Apple has introduced improvements. In macOS 26, Spotlight search is noticeably better. It can execute actions, launch apps, search the clipboard and even include iPhone content. But that’s part of the problem; it searches everything, shows everything, mixes apps, files, web results and actions – yet it isn’t specialised in taking you instantly to the places you actually use every day.
With Homebrew, you can build your own folder navigator that automatically learns which directories you use most. It recognises your patterns and sends you straight to the right folder with a simple keyboard shortcut. Because it adapts to your usage, it gradually learns to sort results by relevance to you (and you don’t have to give up Spotlight). Here’s how to set it up.
To begin, you need to install Homebrew if you don’t already have it. Homebrew is a package manager. Open Terminal as admin, type the following command and press Enter. You’ll be asked for the password you use to log in to your Mac:
/bin/bash -c "$(curl -fsSL https://raw.githubusercontent.com/Homebrew/install/HEAD/install.sh)"Afterwards, you need to set Homebrew’s path so Terminal can find the manager later. Below is the default path since macOS Catalina.
echo 'eval "$(/opt/«Homebrew»/bin/brew shellenv)"' >> ~/.zprofile eval "$(/opt/«Homebrew»/bin/brew shellenv)"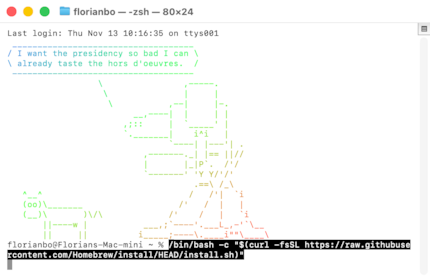
These two tools are essential for your DIY folder navigator. Autojump remembers which folders you use often and lets you jump there with a short command. «fzf» stands for fuzzy finder and is a search tool for Terminal. Now open Terminal again, type the following command and hit Enter to install both tools:
brew install autojump fzf 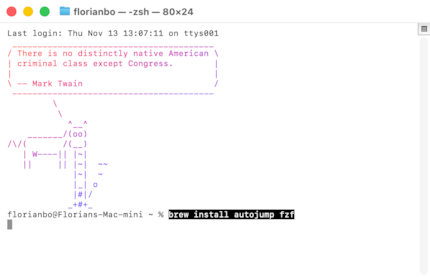
During installation, you’ll be asked a few things, for example: «Do you want to enable fuzzy auto-completion?» Confirm by typing the letter Y for «yes» and press Enter. Afterwards, you’ll need to initialise fzf so it works properly. To do this, type:

$(brew --prefix)/opt/fzf/installConfirm with Enter.
Finally, you need to activate Autojump. Enter the following commands and press Enter after each one.
open -e ~/.zshrcThe text editor will open. Now add the following line to the file and save it:
[ -f /opt/homebrew/etc/profile.d/autojump.sh ] && . /opt/homebrew/etc/profile.d/autojump.shThis checks whether Autojump is available and loads it.
Now run the following command in Terminal so your zshrc file is reloaded with the new commands.
source ~/.zshrcNext up is the quick action (QA), which lets you trigger processes with a keyboard shortcut that would otherwise take several clicks. QA opens a search window and then the folder you select from Autojump’s list.

Open Automator and select «New document». Select «New document» and then «Quick action», and fill in the form with the following values:
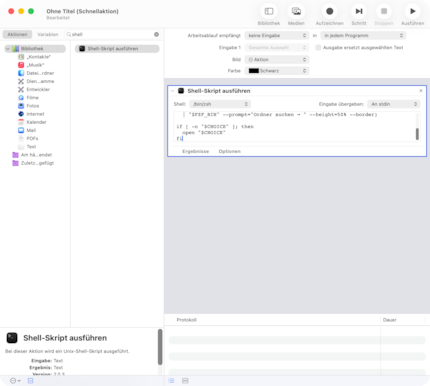
On the left, search for «Run shell script» in the Actions list and add it with a double-click. Then add the following:
Then replace the standard text with this script (launches fzf in Terminal):
export PATH="/opt/homebrew/bin:/opt/homebrew/sbin:$PATH"
SCRIPT="/tmp/jump_fzf.sh"
cat << 'EOS' > "$SCRIPT"
export PATH="/opt/homebrew/bin:/opt/homebrew/sbin:$PATH"
source /opt/homebrew/etc/profile.d/autojump.sh
CHOICE=$(autojump -s<br />  | cut -d: -f2-<br />  | sed 's/^ *//'<br />  | fzf --prompt=’Find folder → ' --height=50% --border)
if [[ -n "$CHOICE" ]]; then
  open "$CHOICE"
fi
exit
EOS
chmod +x "$SCRIPT"
osascript <<EOF
tell application "Terminal"
    do script "zsh $SCRIPT"
    activate
end tell
EOF
Next click «File» and then «Save», and give it a meaningful name such as «Folder navigator».
Finally, you can assign a keyboard shortcut to launch your personal navigator. To do this, open System Settings and go to the keyboard menu. Select Keyboard Shortcuts and click Services on the left. Under General, search for «Folder navigator». Double-click it and set a key combination – ideally one that isn’t already used for something you rely on – and confirm your choice.
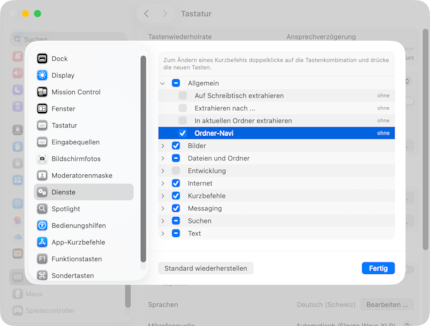
When you press this shortcut, a small text window will appear. Start typing the name of the folder. Over time, the navigator will autocomplete your searches and become faster and more precise.
At first, your new navigator will find relatively few folders. To stop it being a pain to use in the beginning, you can give the navigator a base set of paths. To do this, create another shell script in Automator, just as before. Then insert this script, which adds the standard macOS folders to the search. Give it a meaningful name too.

# !/bin/zsh
export PATH="/opt/homebrew/bin:/opt/homebrew/sbin:$PATH"
SCRIPT="/tmp/jump_fzf.sh"
cat << 'EOS' > "$SCRIPT"
export PATH="/opt/homebrew/bin:/opt/homebrew/sbin:$PATH"
source /opt/homebrew/etc/profile.d/autojump.sh
FAVORITES=(
  "$HOME"
  "$HOME/Desktop"
  "$HOME/Downloads"
  "$HOME/Documents"
  "$HOME/Movies"
  "$HOME/Music"
  "$HOME/Pictures"
)
TMP_LIST="/tmp/jump_fzf_list.txt"
: > "$TMP_LIST"
for d in "${FAVORITES[@]}"; do
  [ -d "$d" ] && echo "$d" >> "$TMP_LIST"
done
autojump -s<br />  | cut -d: -f2-<br />  | sed 's/^ *//' >> "$TMP_LIST"
CHOICE=$(sort -u "$TMP_LIST"<br />  | fzf --prompt=’Find folder → ' --height=50% --border)
if [[ -n "$CHOICE" ]]; then
  open "$CHOICE"
fi
exit
EOS
chmod +x "$SCRIPT"
osascript <<EOF
tell application "Terminal"
    do script "zsh $SCRIPT"
    activate
end tell
EOF
From here on out, the trick is to use your new folder navigator consistently – that’s how you train it and make it better over time.
I've been tinkering with digital networks ever since I found out how to activate both telephone channels on the ISDN card for greater bandwidth. As for the analogue variety, I've been doing that since I learned to talk. Though Winterthur is my adoptive home city, my heart still bleeds red and blue.
Interesting facts about products, behind-the-scenes looks at manufacturers and deep-dives on interesting people.
Show all
Background information
by Florian Bodoky
Background information
by Richard Müller

Background information
by David Lee